|
|
|
 |
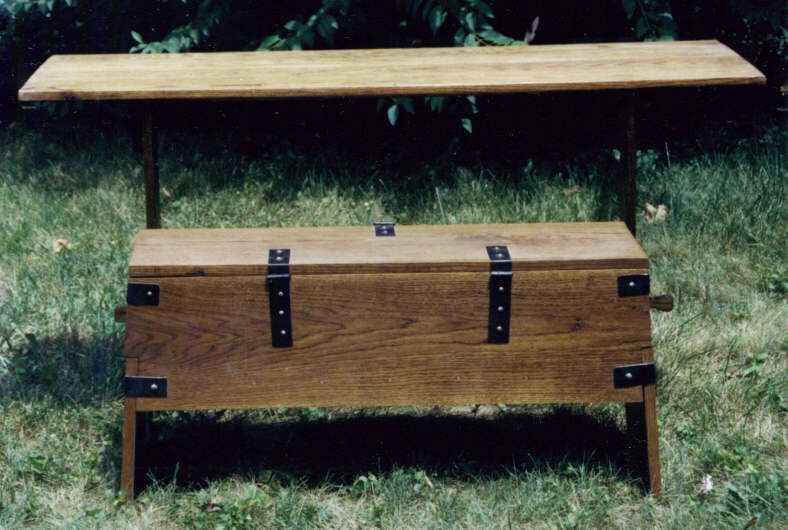
Viking Rowing Chest |  |
|
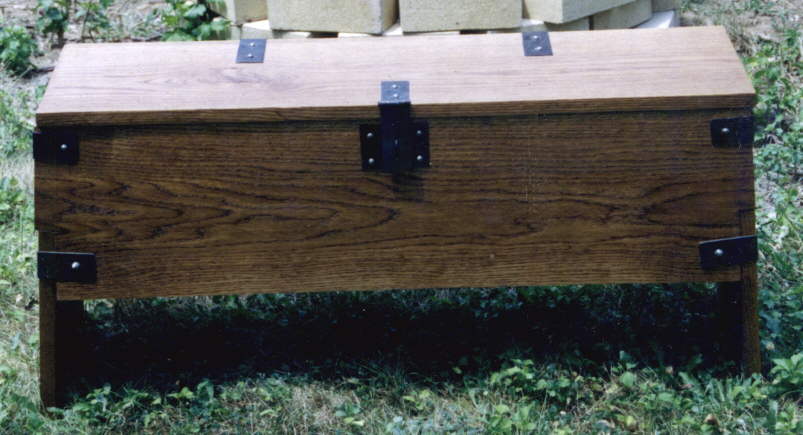
Six Board Medieval Chest |
|
 |
Wood Finish I used a commercial stain, then followed with two applications of boiled linseed oil. Then, in a double pan boiler, I melted beeswax into boiled linseed oil. I use lemon oil to clean it. |
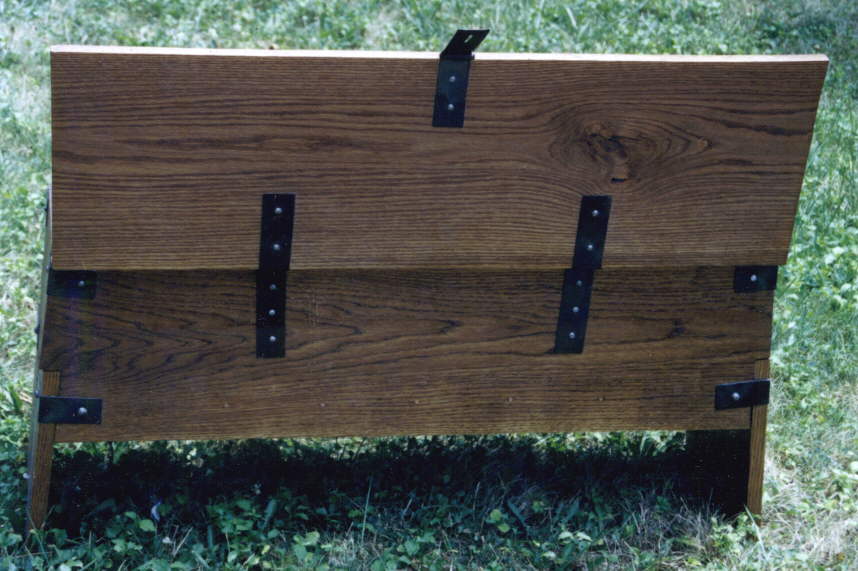
| Viking Rowing Chest The chest is made out of white oak, 7/8" thick, 12" wide and 40" long. |
 |
 |
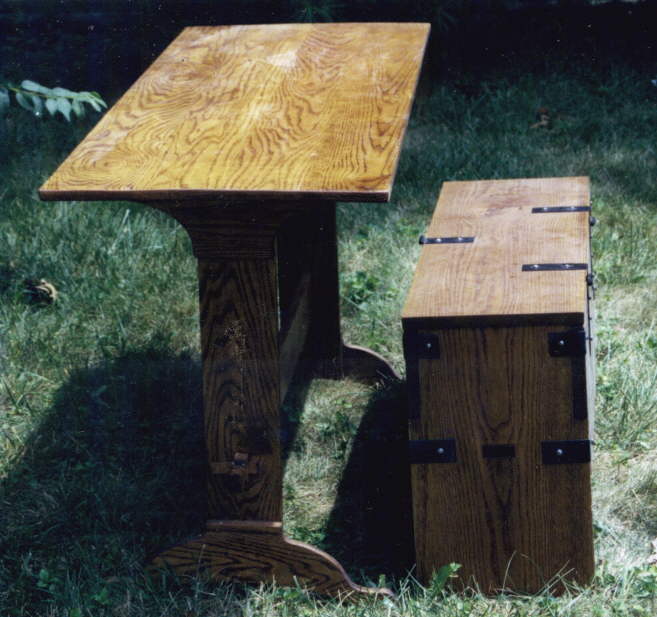
The photo above shows the obvious differences between red oak (trestle table) and white oak (chest). The photo on the left shows the lid up, with red deer straps to stop it vertically. |
| Iron Hardware I started out with a piece of 16 gauge mild steel sheet metal, cut out the pieces with bulldog snips and then pounded them over a rough anvil with a horseshoeing hammer. I ground then sanded the edges. Next I drilled the holes on a drill press and cut the hinge "fingers". I filed everything, wire-brushed the scale off, then bent the hinges around a rod a little larger than the hinge pins. I cut the pins out of iron bar stock, flattened one end in a vise, then peened the other as I tightened the hinge "fingers". Once I was satisfied with the movement of the hinges and hasp, I started a fire with the oak scraps, chips and shavings I had accumulated. I sprayed the metal with WD40 and tossed it into the fire for a while. Then I poured a barrel of water over it and fished them out, wiping with a cloth. The nails I made from iron rivets ground down on a wheel. The metal parts were covered with the final coat of beeswax/boiled linseed oil as well. |
 |
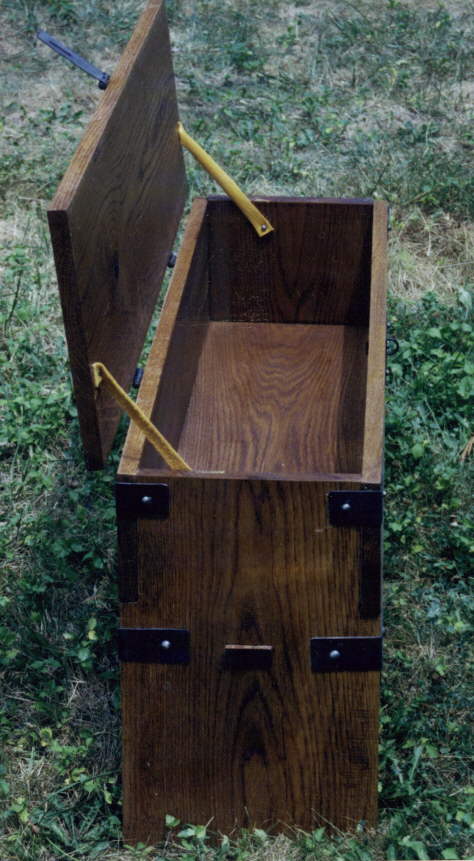 |
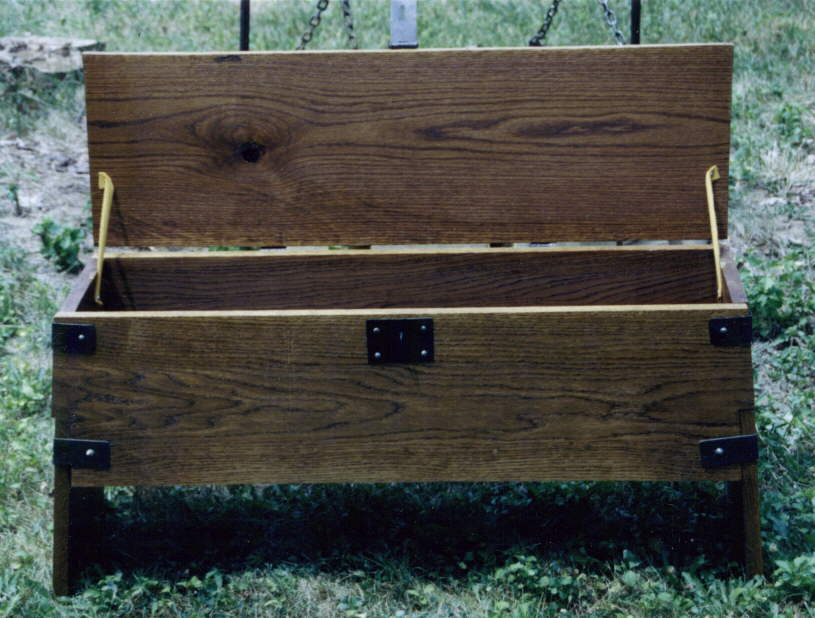
The picture on the left shows the red deer straps on the lid. The picture below shows a completed dado on either the front or the back. |
| Interior Veiw. The tendon from the bottom is shown protruding through the mortise in the end. The bottom also sits in hidden dado joints cut into all four pieces. |
 |
 |
Below we see a detail of the hinges in the open position. |
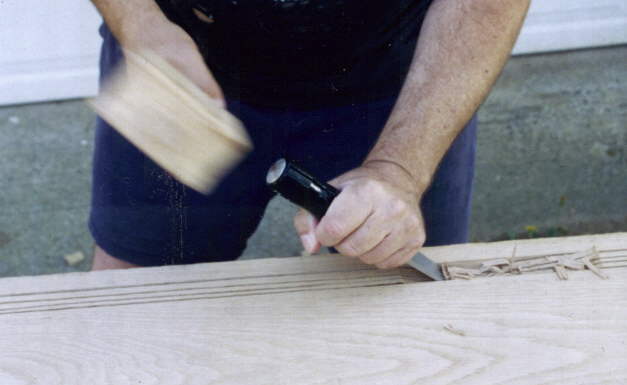
| Carving Dado Joints While far easier with a tablesaw or a router bench, dados can still be cut with chisels in wood as hard as oak with little difficulty. Use a hand-held circular saw to define the areas, and score it a few times if it is more than a half inch. The blade being previously measured to proper depth allows an easy chore with a sharp chisel and mallet. |
 |
|
|
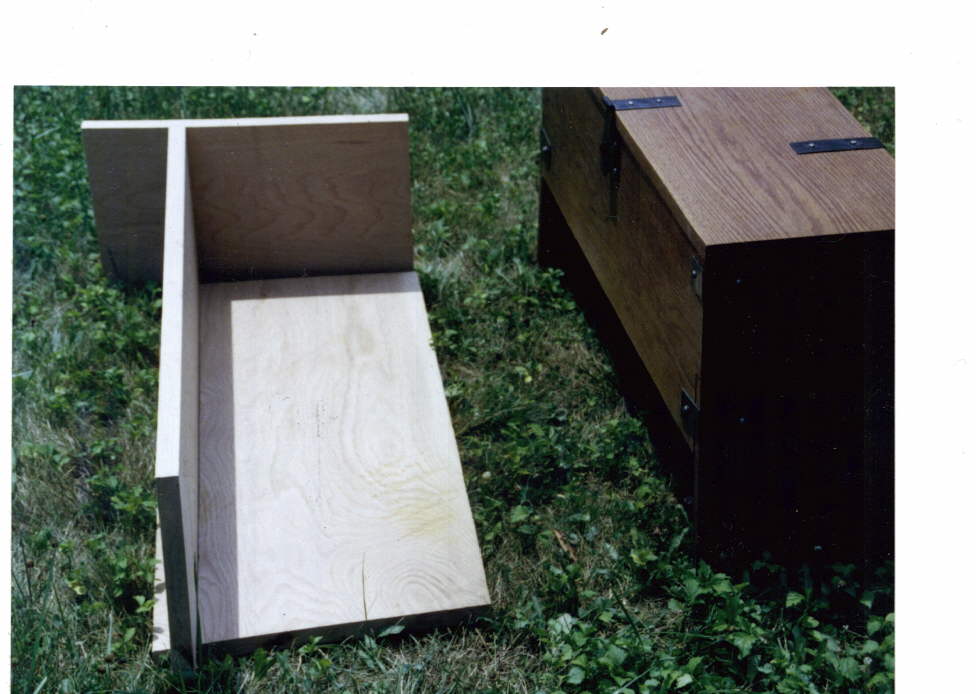
Partially Constructed Bench & Finished Product The bottom is seated in the dado. The end is cut to size, but the mortise and dado have yet to be cut. |
|
Lay-out of finished pieces |
 |