|
|
|
 |
Viking Kit |  |
|
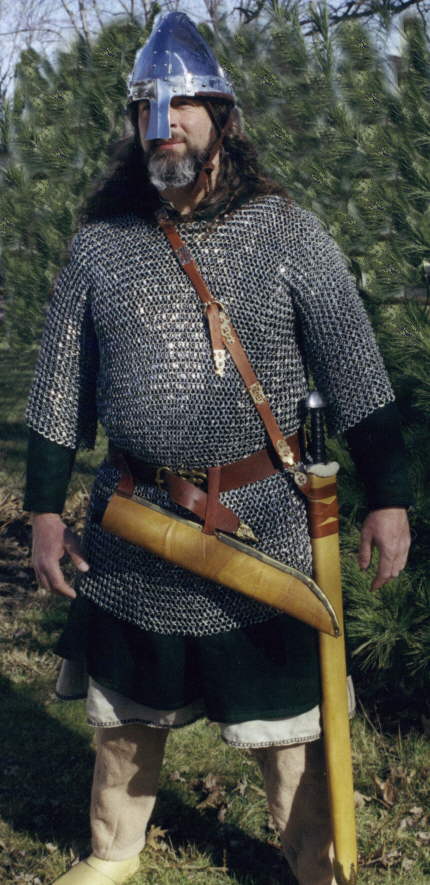
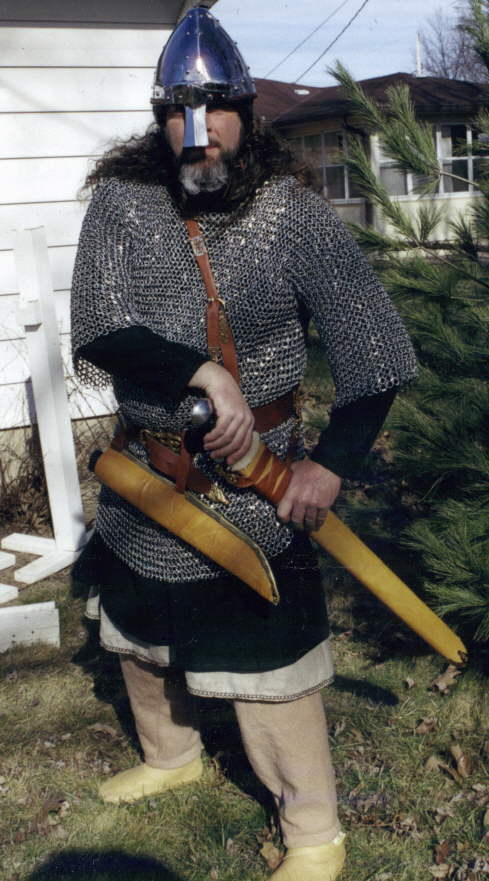
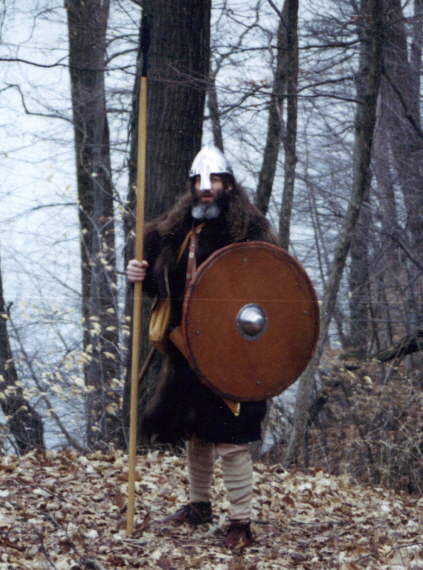
9th - 10th Century Viking Hersir |
||
|
|
Bjorn, the 9th C. Norwegian, raider of Ireland and Brittany, and perhaps later joining the great horde? |
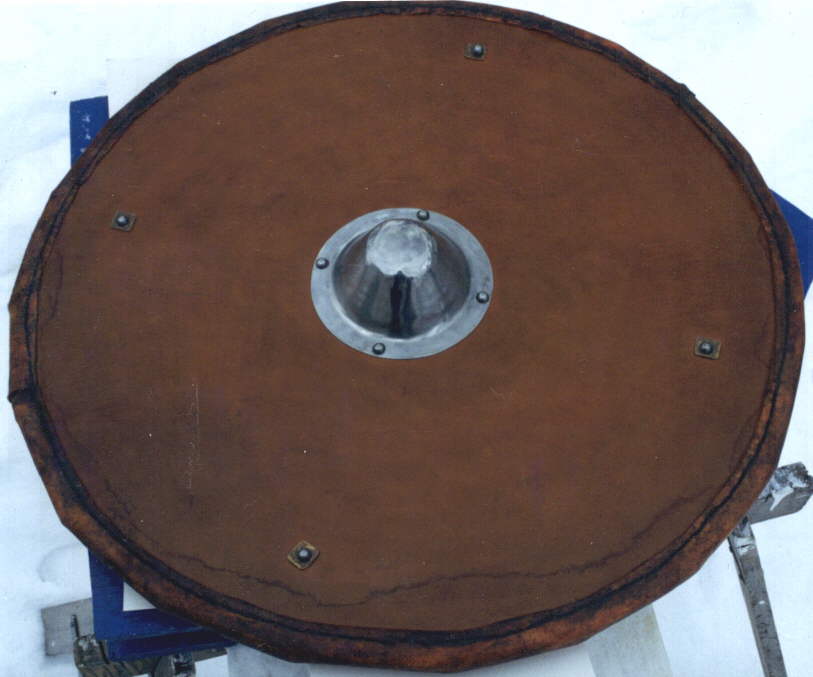
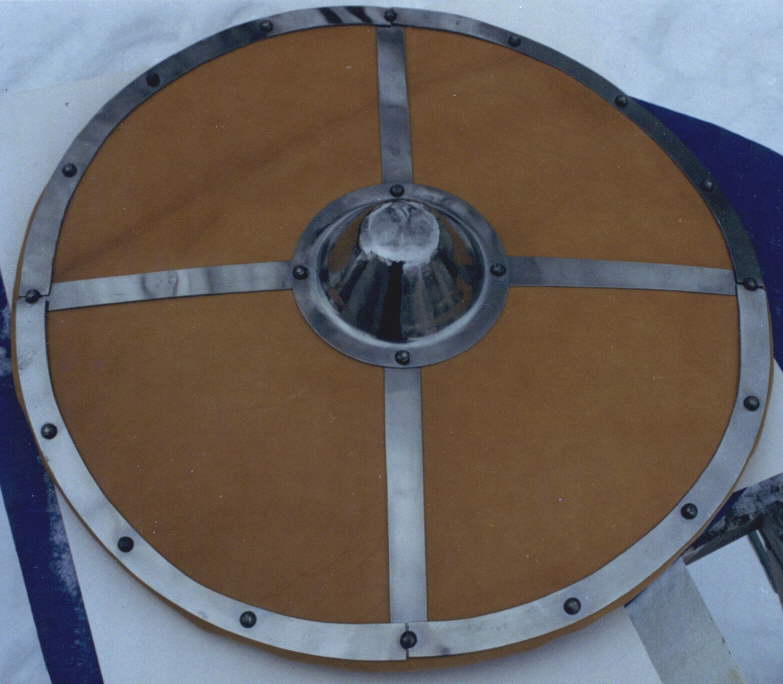
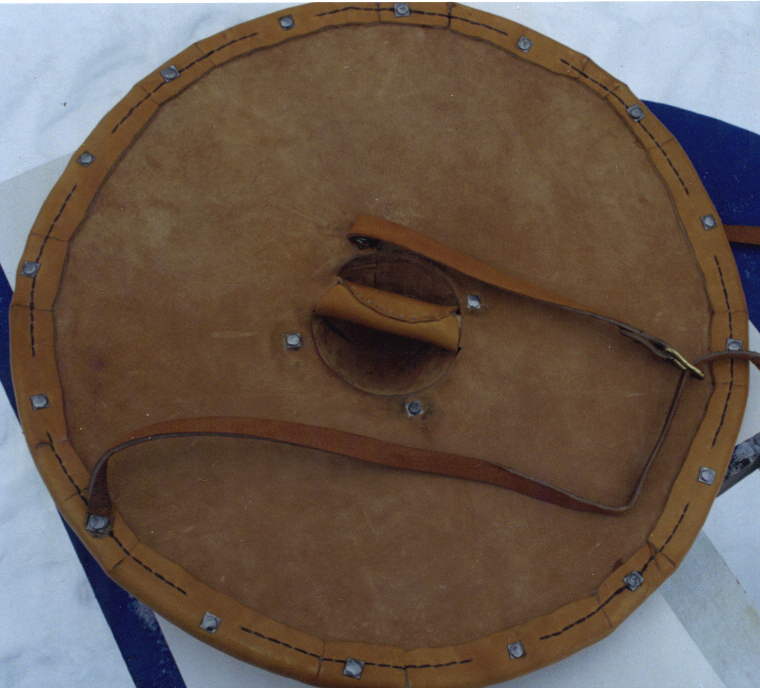
Regia combat shield - made of 2 layers of 1/4" basswood, covered with cowhide, edged in rawhide, it is 29" dia. |
|
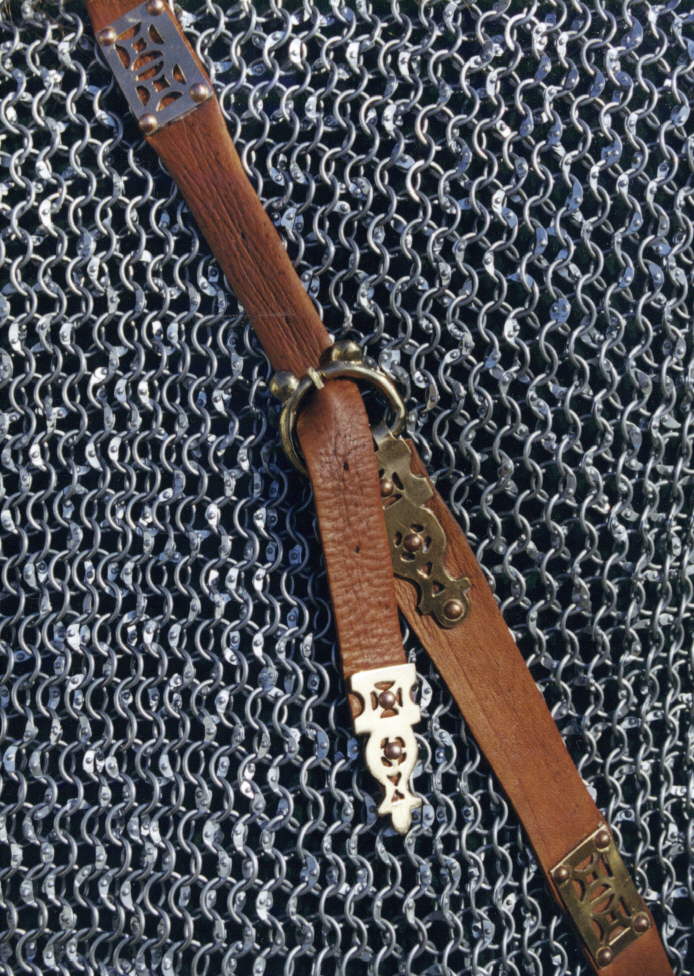
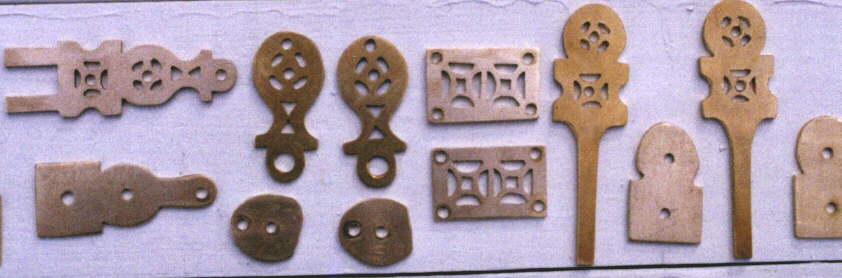
The bronze plaques were probably cut by chisels in the original, but I used a different technique. Intending to develop skills to do a brass/sterling silver 15th C. saddle, I took copies of a Dover open work pattern and glued it to the bronze plaques. Next, I drilled a hole in every one, cut the shape with a jewelers' saw, and cleaned it up with jewelers' files. This has taken over a year. I sanded each one, polished it and mounted it with copper rivets. On the same page, there is a key hole shaped design that I modified for the belt tip, the buckle, the chape and the hooks on the frog. The buckle was made by taking a 'D' ring a little thicker than what I wanted, pressing it into Delft clay, then I added the lobes with a pencil eraser. Next, I poured melted machine wax into the impression, and filed and sanded the wax into the mold. I used this to cast the buckle in bronze, and used brazing wire to make the tongue. |
Another view of Viking kit. |
Steel Rimmed Frankish Shield |
|
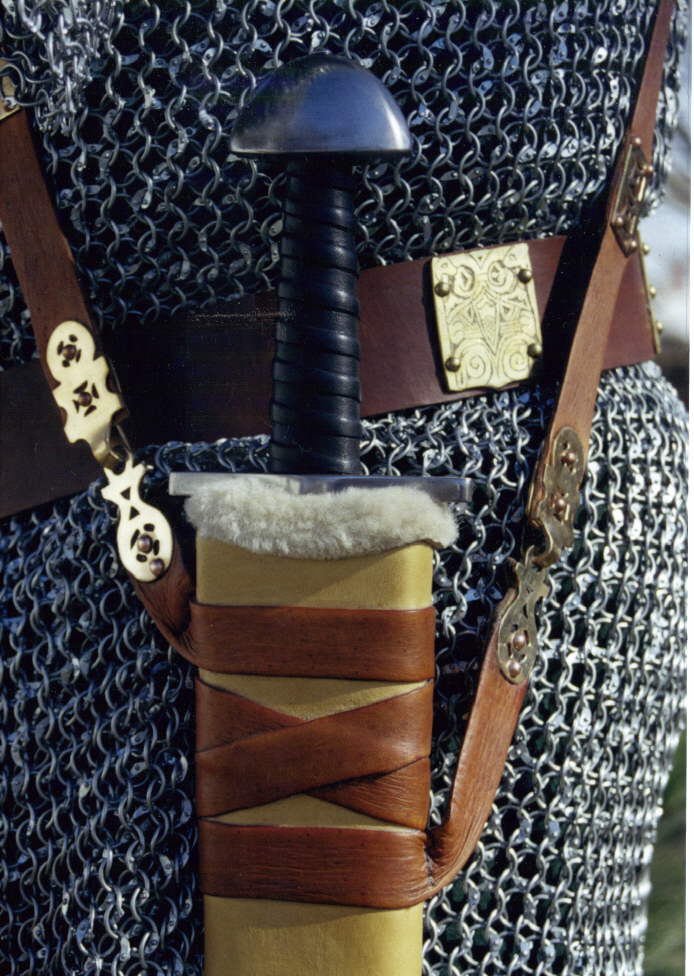
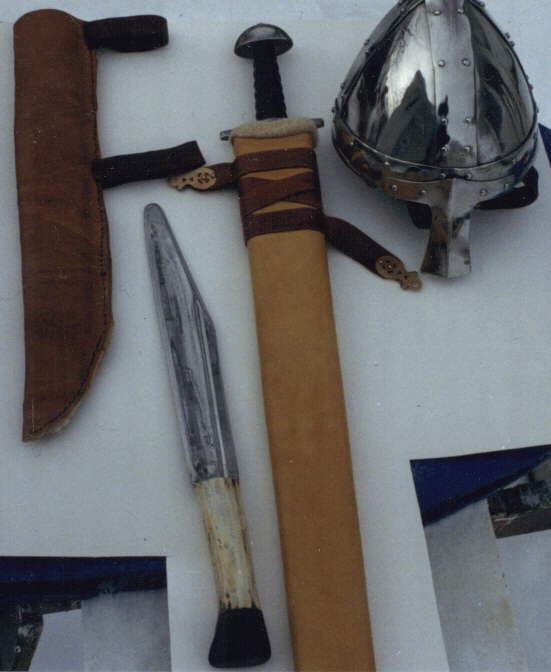
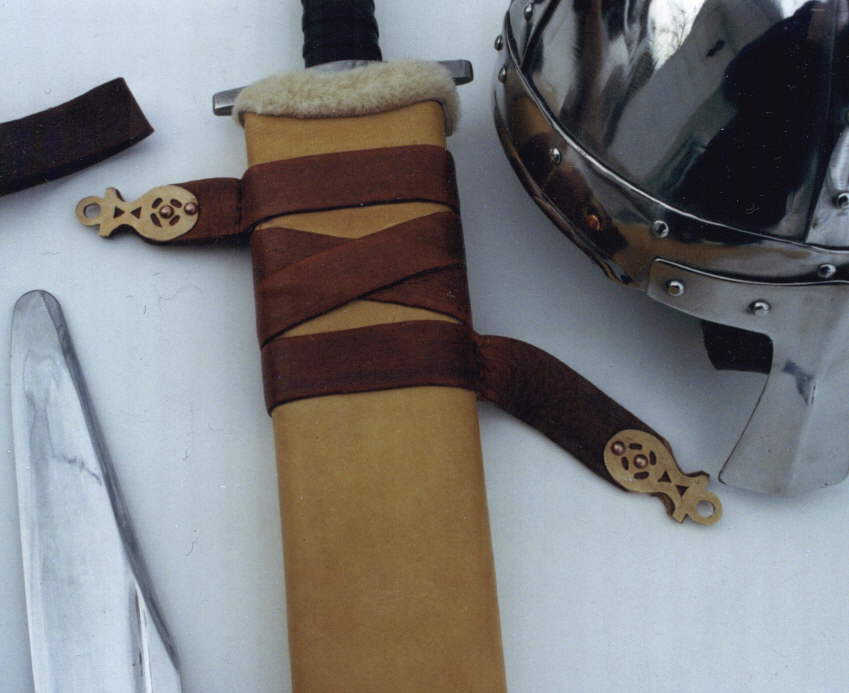
The scabbard was made for my Johannes Schmidtberger Viking sword. I wrapped the blade in the fleece, first trimming the wool to 1/4 - 1/2" thick, an inch or so too long, then stitched it like a cheap knife sheath. I turned the fleece so the stitch was on the flat of the blade, and used this to carve the two pieces of bass wood. I used a hand rasp to finish the outside of the wood, then glued the sword & fleece inside the two pieces of basswood. When that had dried, I cut some rawhide to size, wetted it, then stretched it over the wood, and stitched it up the back. Next, I glued and stitched deer hide over the rawhide, trimmed and turned down the wool at the mouth, and glued it. The result is a scabbard that draws easily, but can be held upside down without the sword falling out. The wool "locket" keeps out rain, and the lanolin keeps the blade from rusting. The frog is made of elk, glued and stitched at the two ends. |
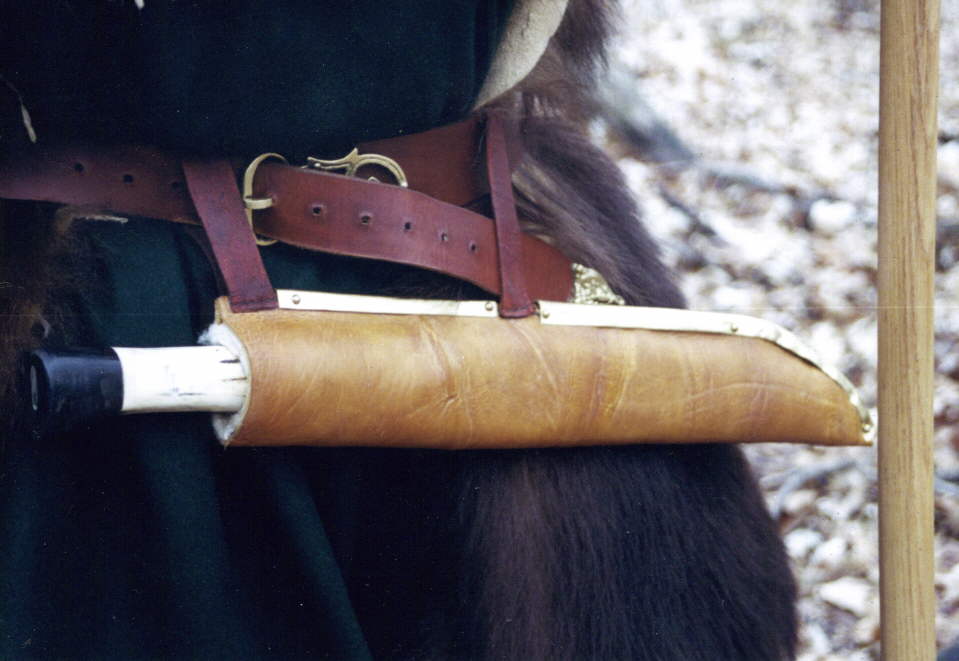
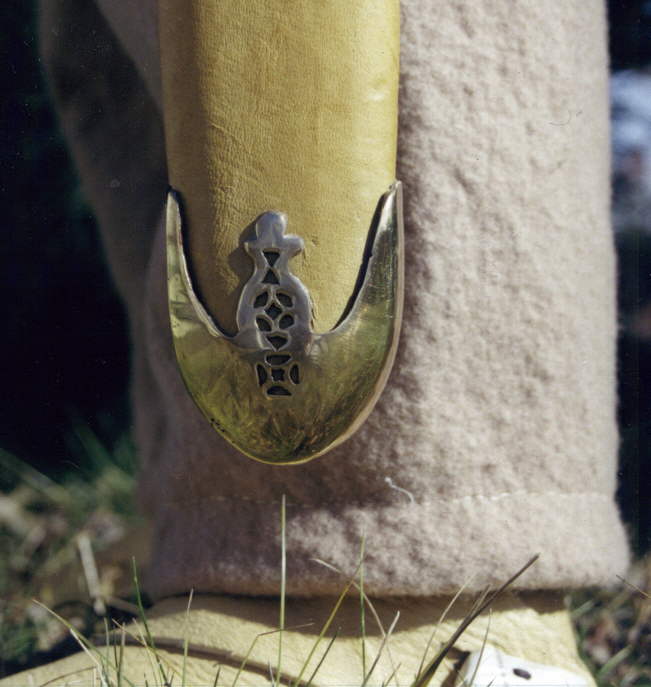
Detail of the seax scabbard. The brass is riveted with brass rivets over the stitched seams, and the belt loops are American Elk, which I believe is similar to English Red Deer. It is made of cow hide, lined with fleece. Jelling Dragon made the seax. |
Back of the combat shield. The 2 rivets on the guige strap need peened, and the boss will probably be lined with fleece. |
|
The scabbard chape is from the same design, cut and filed, then dished to fit the scabbard. A second horse-shoe-shaped piece is on the back. A third horse-shoe-shaped piece covers the edges. I had Mike Negy braze the three pieces into one because I didn't want to see my hard work vaporize by my poor brazing technique! |
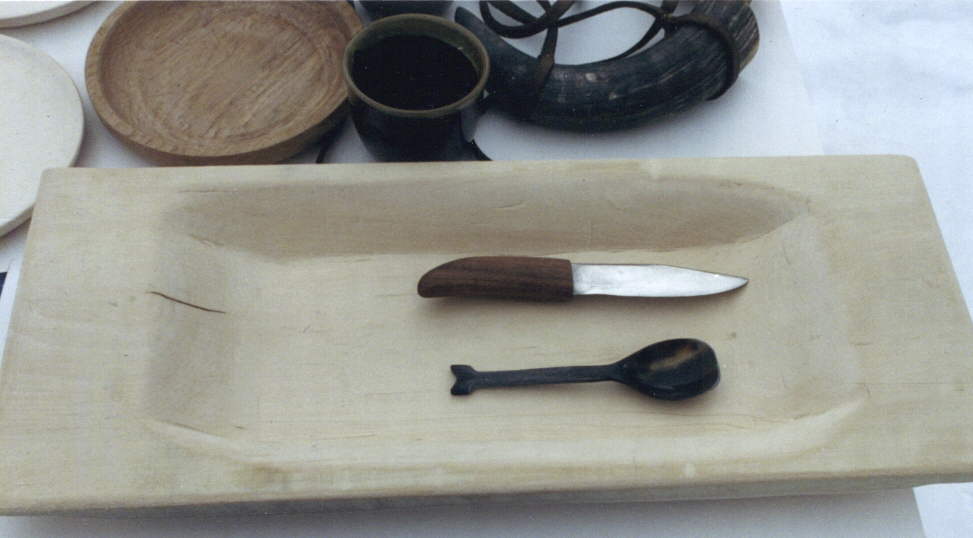
The trencher was carved with a wooden mallet and a chisel. The 4" seax has a watered steel blade and a walnut grip. The horn spoon will be polished and engraved eventually. |
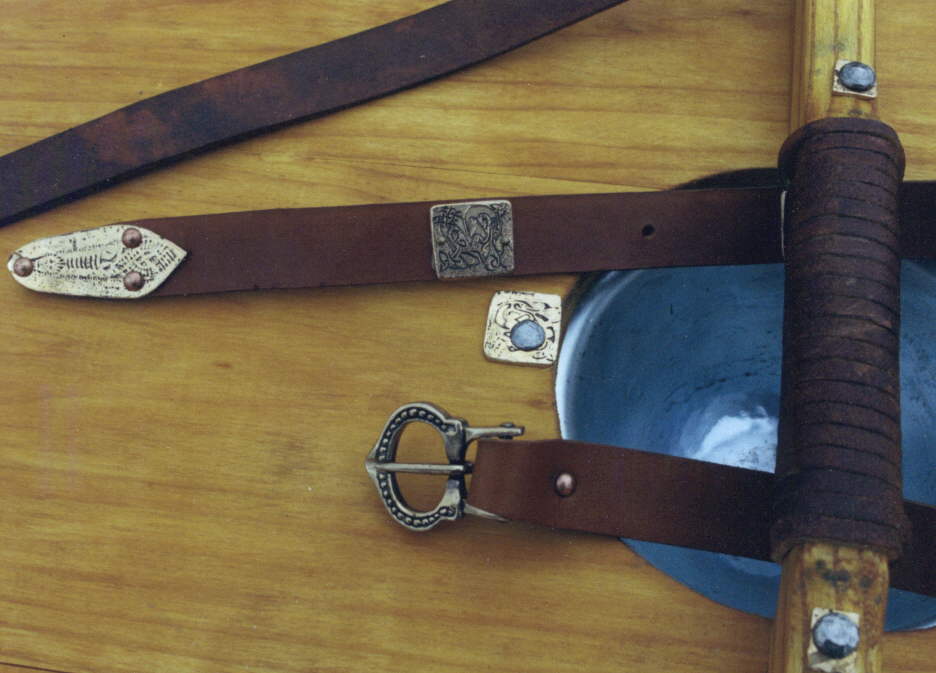
Detail showing matching acid-etched washers and strap plaques, as well as the etched belt tip. The handle is wrapped in leather. A Jelling Dragon buckle finishes the guige strap. |
|
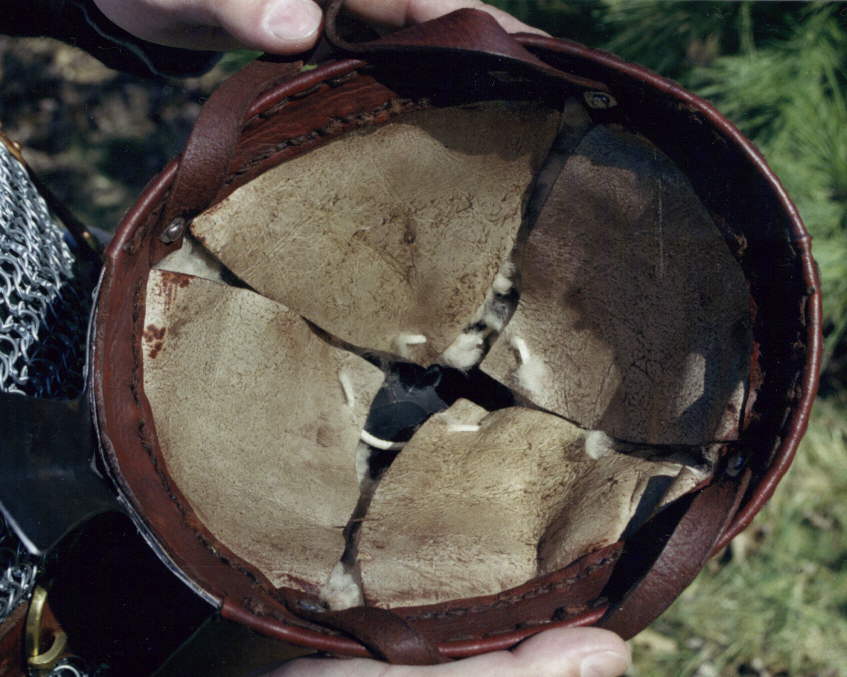
I started with a MacKenzie-Smith spangenhelm, took of the bogus chin straps, and beat the machine 'roll' out with a farriers' hammer. I then plantished out the hammer marks with a body hammer, and polished. Next, I drilled holes all the way around the rim, and stitched elk hide with a heavy waxed linen thread to the rim. The sheep fleece was cut into pie-shaped pieces, and trimmed down to where it padded the helmet and fit well. I stitched it to the elk, and put a thong through two hoes punched into the tips for adjustment. The chin straps were riveted to the helmet itself, and tie with a swallow-tail through two holes. |
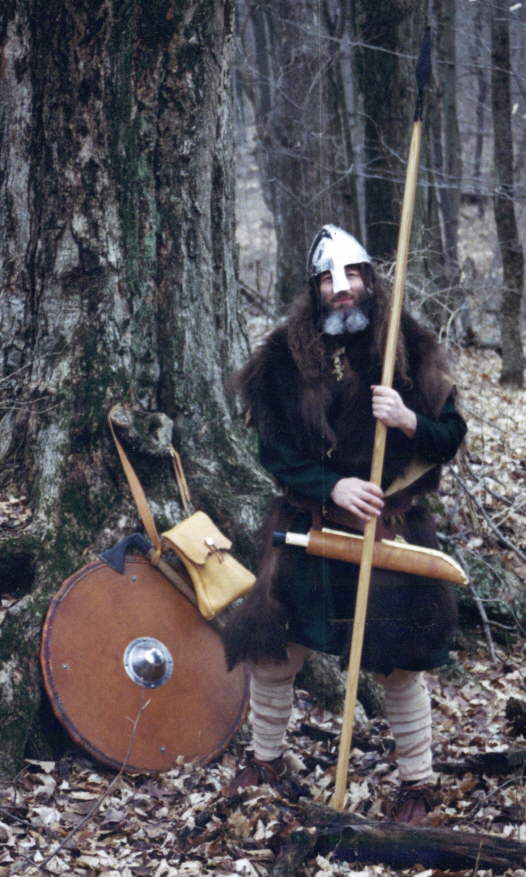
Bjorn surveying the situation. |
Spangenhelm and Jelling Dragon combat seax, the scabbard of which still needs brass edging over the seams. "Sharp" sword, in a scabbard made of fleece, carved basswood, rawhide and covered in deerhide. The baldric hooks to the bronze open-work attached to elk straps. |
|
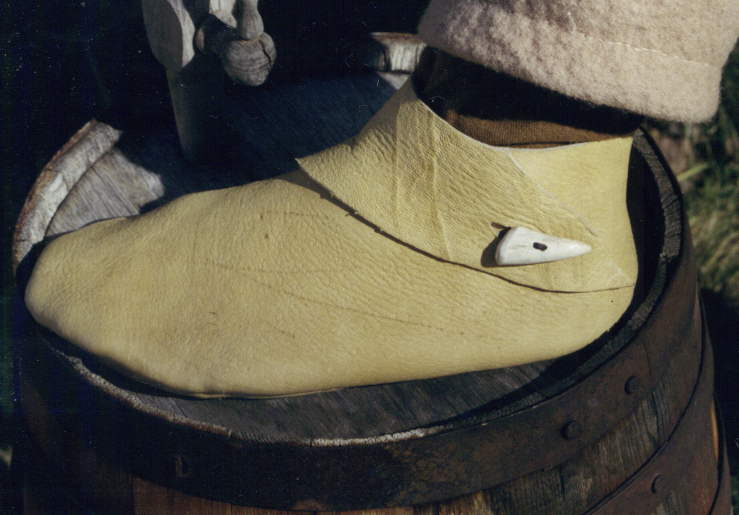
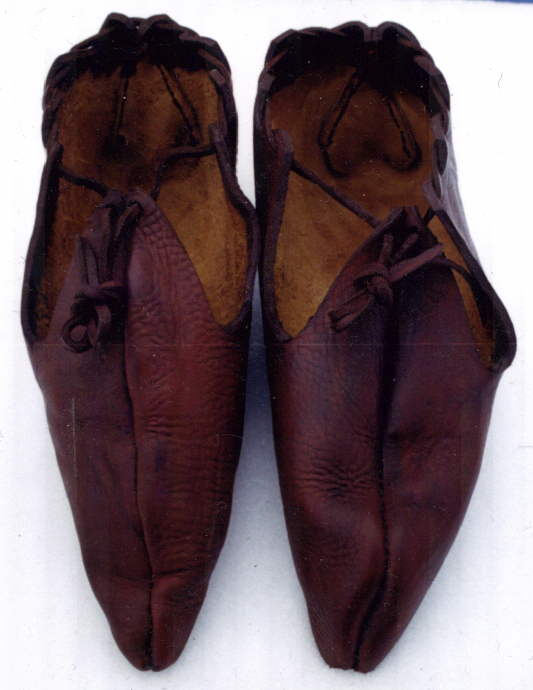
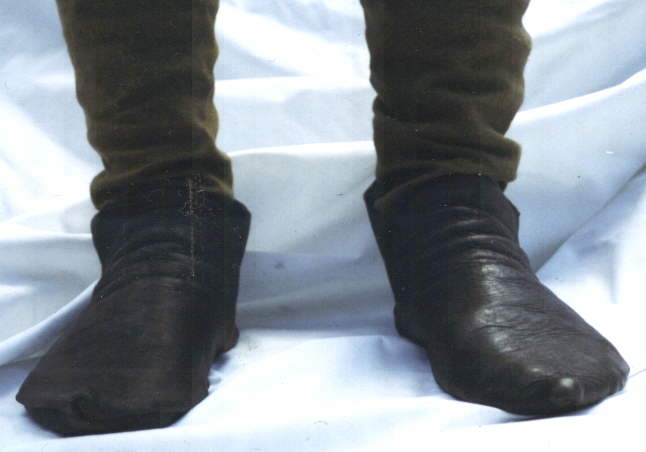
I made these turnshoes out of moccasin-weight moose hide and tines from elk antlers as clasps. I started with a piece of tent canvas and made mock-ups, and pinned them for fit. I traced these onto the hide, flipping the pattern over for the other shoe. Next, I started stitching from the instep towards the toe. I used a 4-pronged chisel to make 12 holes at a time, stitched them, and refitted, since I didn't have a wooden last. I did the heels in the same manner. After stitching the shoes, I turned them and stitched the tines. Then I cut the keyhole slots on the wraps. Patty took a ruler and measured and drew a line around the tops, which I followed to cut off the excess. I oiled the leather with mink oil and sealed the knots with barge cement. |
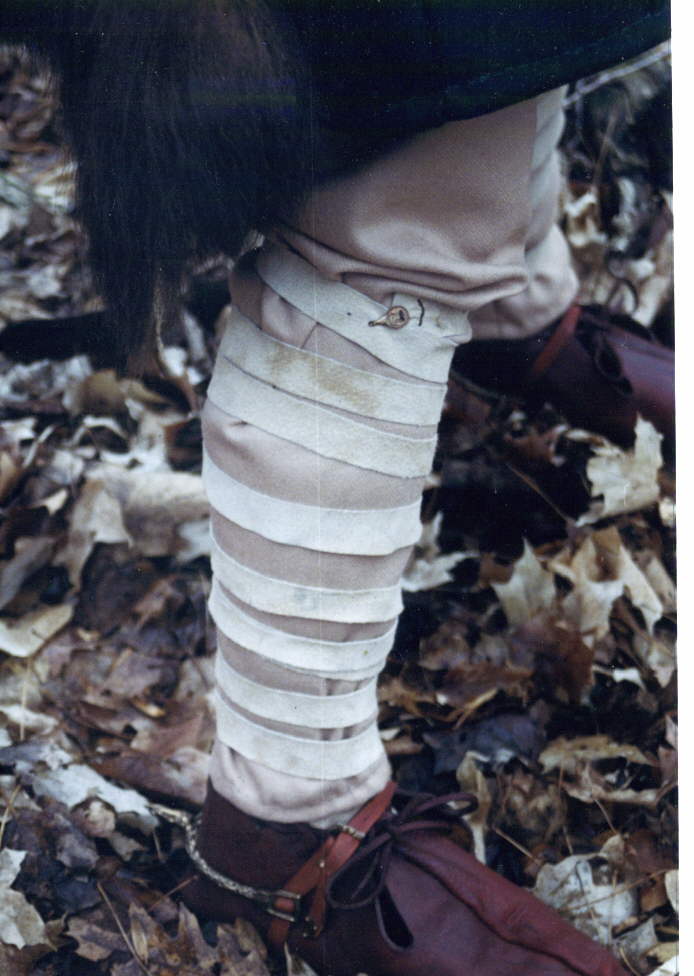
Pigskin puttees with Quiet Raymond's bronze clothing hooks. |
Detail showing fleece folded over mouth to keep out moisture. |
|
The back shows the pigskin covering, the stitched cowhide front covering, and the square washers and steel rivets holding on the rim, boss and guige strap. |
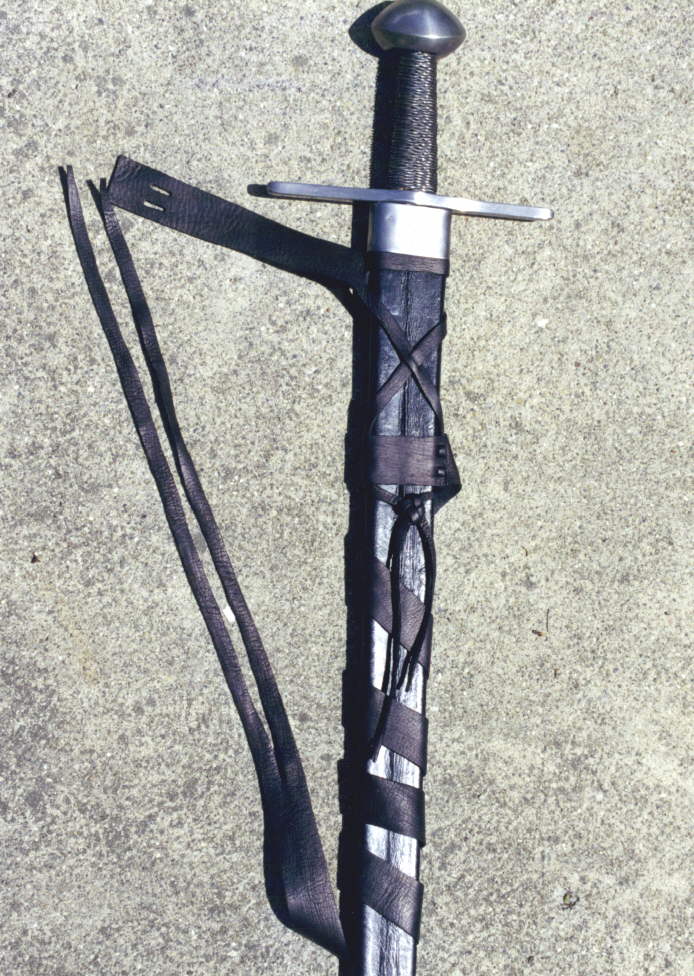
12th C. Sword with Brazil nut pommel. |
Bronze open-work baldric plates. The first is for the buckle, but the 'D' has yet to be cast. The round plates are now mounted on the sword scabbard. The square plates are decorative, and the round plates will be bent into a hook to clasp the matching fittings on the sword scabbard. The plain plates are "washers". The belt buckle has been cast, and all of this can be seen in the first photo on this page in completed form. |
|
9th Century Frankish Carbatine turnshoes. My first attempt, although I have since made Patty a pair of Irish slippers, and am going to attempt a pair of Viking ankle boots. |
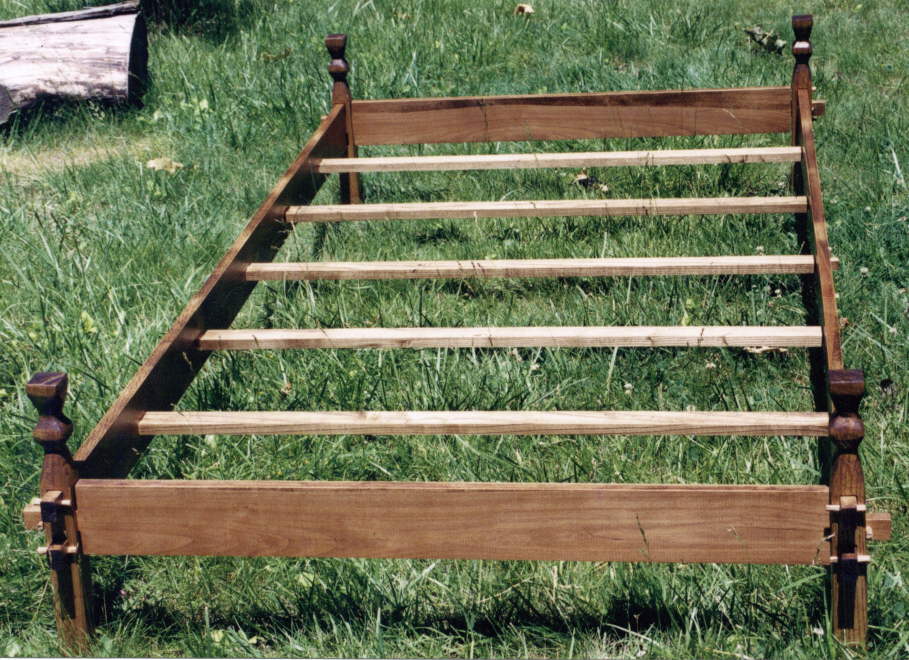
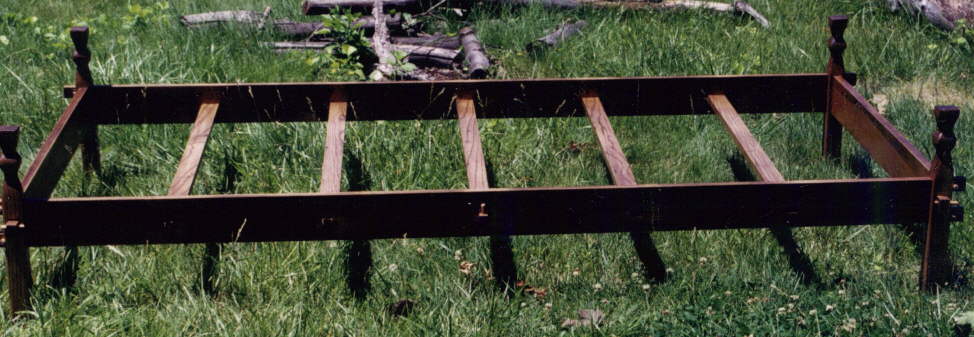
Gokstadt Bed. I hand-carved the mortise and tendon joints, as well as the end posts with a wooden mallet and chisels. The finish is boiled linseed oil and polished with beeswax melted in boiled linseed oil. |
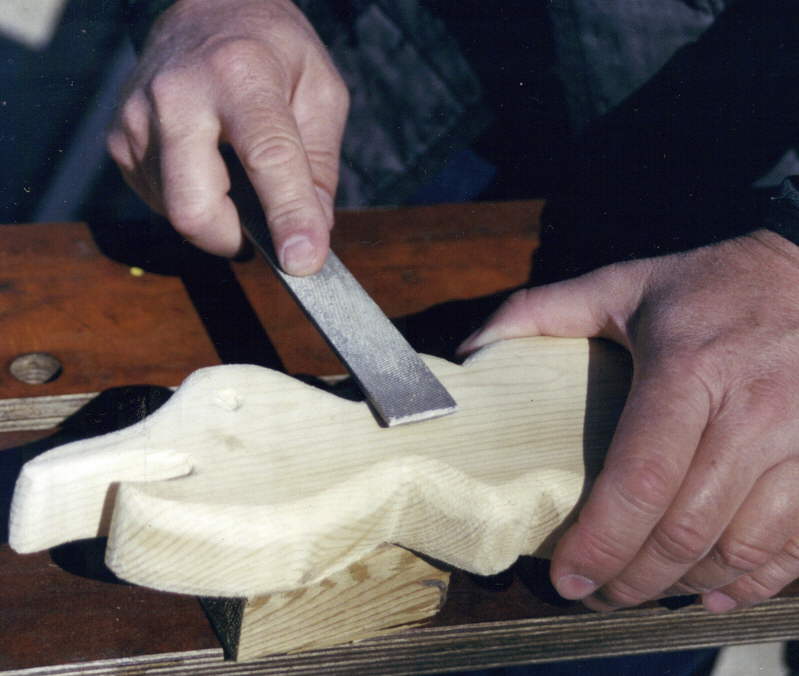
Carving the Heads. |
|
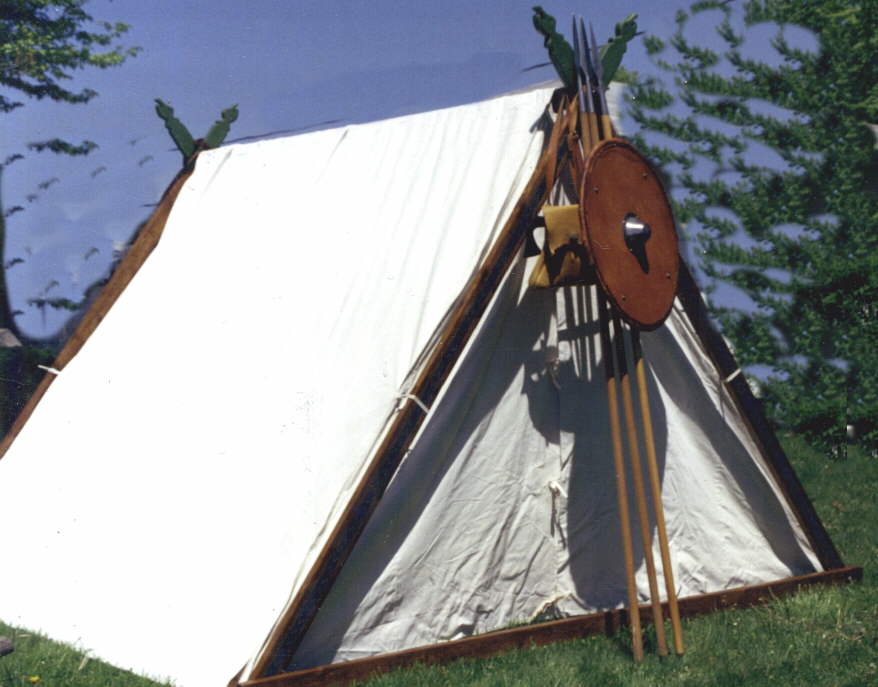
Viking Tent Front View |
Gokstad Bed. The sides are made of beech, the corner posts and slats are of ash. |
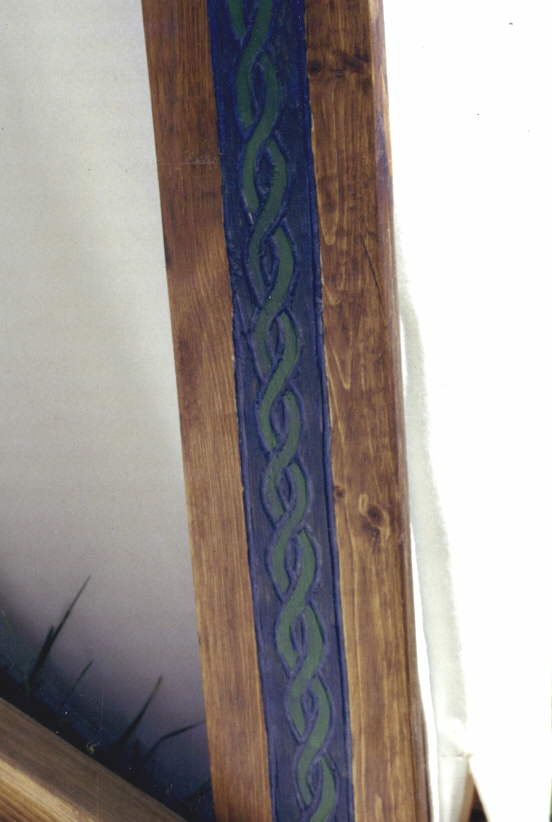
Carving the Interweaving Design. |
|
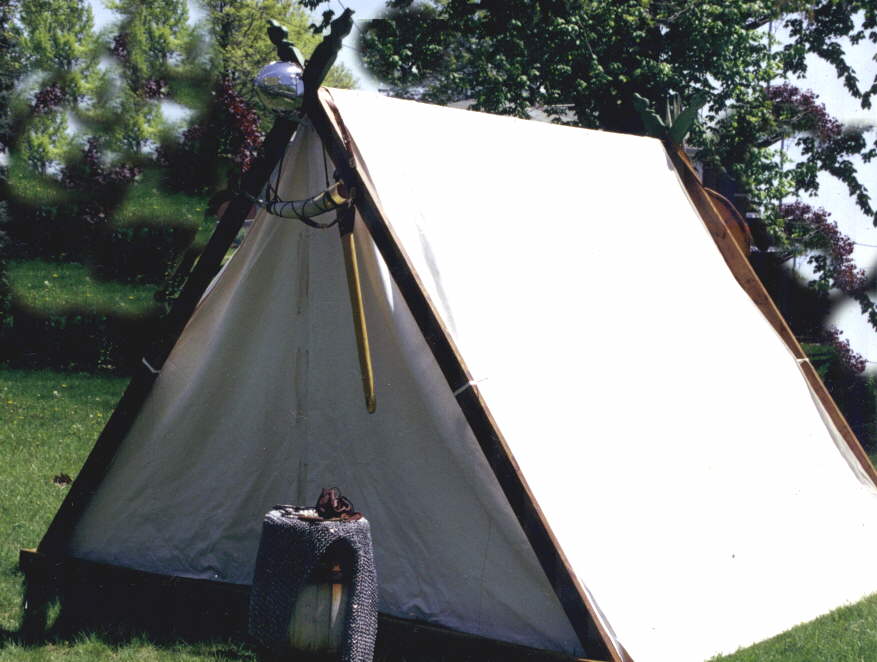
Viking Tent Rear View. |
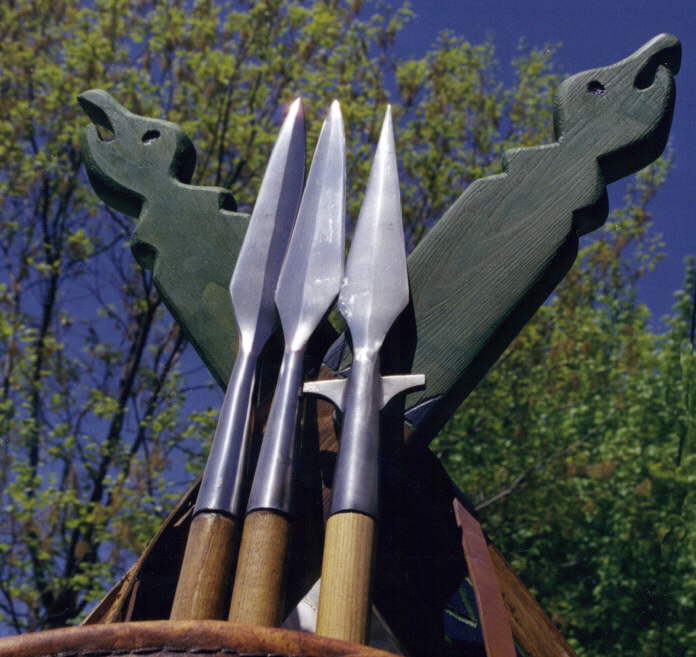
Carved Viking Tent Poles. |
Carved Interlocking Design. |